How to Do 2G Welding Position for Beginners
Mastering How to Do 2G Welding Position the Right Way
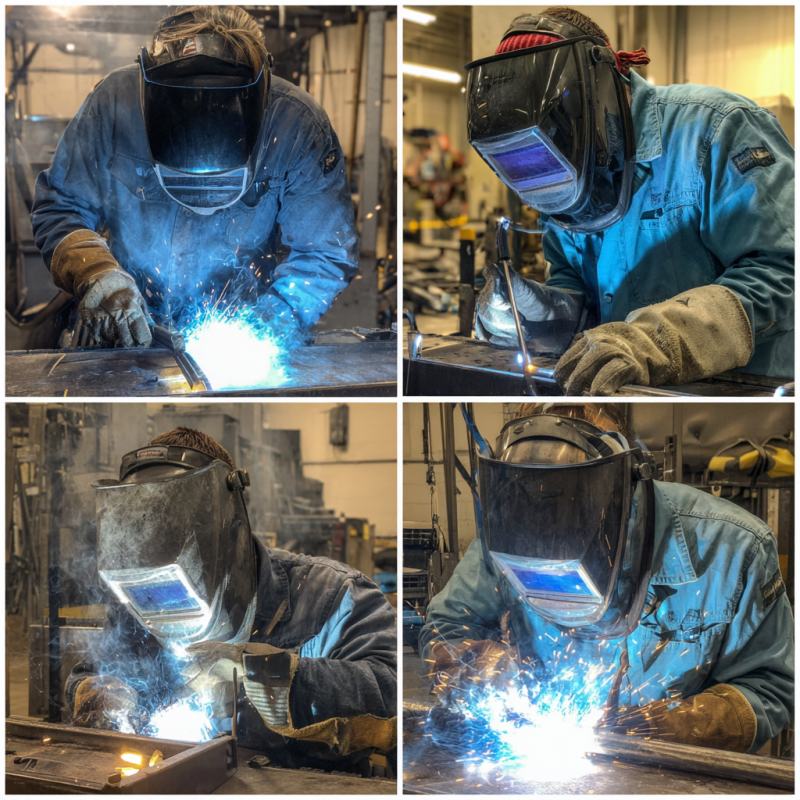
Many welders wonder where to begin. If you’re learning how to do 2G welding position, the 2G position, unlike 1G or 6G, focuses on horizontal welding on pipes or plates, building control and cleaner welds. At Red River, we know precision in every weld position boosts safety and quality. Here’s a step-by-step guide to help you master 2G welding.
Explore the 2G concept
The 2G welding position places the workpiece horizontally with the weld path vertical to the ground. For pipes, the axis is vertical, and welding is done in a horizontal line around it. Though gravity affects the puddle, proper technique ensures a smooth, uniform bead.
2G is one of several different welding position categories. If you are new to these labels, you may want to compare them by checking out what the different welding position. 2G welding supports broader goals, often used in spools, modules, and facilities to ensure strong, leak-free horizontal joints.
A quick side note on prefabrication
Prefabrication in a controlled shop reduces risks, improves consistency, and saves worksite hours. The 2G position suits prefabricated sections, allowing part rotation for safer, easier, and cleaner welds.
Benefit from mastering 2G
Before diving into the steps, let’s look at why the 2G position is worth your time:
- Better weld quality: The horizontal orientation gives you a clearer view and more control over the weld pool. This can result in fewer defects, like slag inclusions or porosity.
- Enhanced safety:A horizontal setup reduces strain and sparks, ensuring steadier performance in shop and on-site.
- Versatile skill set:Learning 2G builds a strong foundation for vertical, overhead, and advanced 6G welding certifications.
As a welder, you will run into multiple configurations, from 1g welding position to 5g welding position. The 2G method enhances safety and weld quality. Red River’s equipment and QC reduce errors, ensuring stronger final products.
Steps to do 2G welding
Practice builds muscle memory, but a clear workflow helps. Mastering 2G welding takes technique, patience, and safety commitment.
Get familiar with your materials
Start by choosing the right filler metals and base materials. For pressurized systems, carbon or stainless steel are common. At Red River, we use ASME-certified materials. Ensure:
- Correct thickness per design.
- Clean, prepared surfaces.
- Compatible filler metal for temperature, speed, and shielding gas.
Secure your workspace
Recreate stable prefabrication conditions by clamping or positioning the pipe or plate securely. For 2G welding:
- Place the workpiece with the axis vertical.
- Ensure comfortable side access to the horizontal weld line.
- Check power, cables, and gas lines for hazards.
A tidy station prevents errors and keeps your arc consistent.
Prioritize safety
Safety goes beyond gear. Follow daily protocols:
- Wear helmet, gloves, jacket, glasses.
- Ensure ventilation.
- Keep a fire extinguisher nearby.
- Inspect cables and hoses for damage.
A well-maintained environment not only protects you but also contributes to a steadier, more confident weld.
Choose the right welding process
Several processes suit 2G welding SMAW (Stick), GMAW (MIG), or GTAW (TIG) depending on material thickness, weld quality, and productivity:
- SMAW: Common for pipelines, easy setup, frequent rod changes.
- GMAW: Faster, less waste, requires shielding gas and feeders.
- GTAW: High-quality welds for stainless or alloys, but slower.
At Red River, we match processes to client specs, ensuring ASME compliance.
Set your parameters
Dialing in amperage, voltage, and travel speed is as important as torch control. Generally:
- Stick: Follow electrode guidelines; adjust amps for a stable arc without spatter.
- MIG: Balance voltage and wire speed for a steady crackle; avoid extremes.
- TIG: Maintain arc length, moderate amps, and steady filler feeding.
Aim for smooth beads with minimal spatter. Test on scrap if settings seem off.
Establish the right torch angle
Controlling the molten pool in 2G welding takes practice. Tips:
- Keep a 10–15° leading angle.
- Position yourself to track root and later passes.
- Watch puddle edges for undercut or overlap.
- Adjust angles slightly per pass, letting each cool.
A steady approach reduces defects.
Manage your travel speed
In 2G, a consistent travel speed is key for uniform filler deposition:
- Move too fast, beads thin or break.
- Move too slow, filler piles, causing defects.
Watch the molten pool’s size and shape. If it looks loose or runs down, pick up the pace. If it looks shallow or incomplete, slow down slightly and let the filler fill the joint properly.
Apply multiple passes if needed
For thicker materials:
- Root pass: Fuses joint base.
- Hot pass: Clears slag, refines shape.
- Filler passes: Build thickness, prevent gaps.
- Cap pass: Smooth final surface.
Overcome common roadblocks
Even if you follow these steps, everyone faces hiccups along the way. Here are frequent challenges and how to fix them:
| Symptom | Possible Cause | Quick Fix |
| Excessive spatter | Voltage too high (MIG) or amps too high (Stick) | Reduce current, ensure correct wire feed, or lower heat range. |
| Undercut | Travel speed too fast or improper torch angle | Slow down slightly, tilt the torch 10 to 15 degrees, ensure uniform penetration. |
| Porosity | Contaminated surface, damp electrode, poor gas shielding | Clean the joint thoroughly, dry electrodes, use enough gas flow, check for leaks. |
| Lack of fusion | Low heat input, poor arc length | Increase voltage/amperage within safe limits, maintain consistent arc distance. |
When in doubt, pause and do a small practice welding on scrap pieces. Even experienced welders rely on quick tests to exact the right parameters.
Enhance your 2G expertise
The best technique merges knowledge with hands-on experimentation. Here are practical ways to keep growing:
- Seek professional feedback: Take courses or mentor guidance; Red River trains all levels.
- Incorporate continuous improvement: At Red River, we apply Lean Six Sigma refining welding methods, adjusting parameters, and improving bead quality.
- Compare with other positions: Explore 2G welding and other positions to master transitions.
- Keep an eye on new advances: Welding evolves quickly with new materials, power sources, and safety gear boost results.
Light recap and next step
Learning the 2G welding position means setting up your workspace, managing torch angle, and fine-tuning parameters for horizontal welds. Quick summary:
- Clamp the workpiece horizontally.
- Wear protective gear, inspect the station, and ensure ventilation.
- Choose Stick, TIG, or MIG for the material.
- Set voltage, amperage, and travel speed; watch the weld pool.
- Layer passes, clean between each.
- Focus on form and consistency patience with 2G builds confidence and prepares you for advanced projects.
How to Do 2G Welding Position Successfully
Learning 2G welding means setting up your workspace, managing torch angle, and tuning parameters for horizontal welds. With patience and consistency, you’ll master it and progress to advanced techniques and certifications.
Ready to Master How to Do 2G Welding Position?
Take the next step and practice how to do a 2G welding position today. Build confidence, refine your technique, and unlock more opportunities in your welding career. For guidance, equipment, or training support, contact us.
Frequently Asked Questions
1. What does 2g welding position mean?
The 2G welding position means performing a horizontal groove weld on a vertical pipe or plate. The pipe’s axis stays vertical while the weld is made horizontally, helping welders improve control, quality, and readiness for advanced certifications.
2. What is 2g welding position?
The 2G welding position is a horizontal groove weld on a vertical plate or pipe. It helps welders build control, produce strong joints, and prepare for advanced welding certifications.
3. What is the procedure of 2G welding?
The 2G position focuses on horizontal welding for cleaner, controlled welds. At Red River, we know precision matters for safety and quality. Here’s a step-by-step guide to mastering 2G welding.
4. What are the positions for 1G 2G 3G 4G 5G 6G welding?
Welding positions define how a joint is oriented during welding. 1G is flat, 2G is horizontal groove, 3G is vertical, 4G is overhead, 5G is fixed horizontal pipe welding, and 6G is at a 45° inclined pipe, considered the most challenging.
5. What is the position of the 2G plate weld?
In the 2G plate weld, the plate is positioned vertically while the weld is applied horizontally along the groove. This setup allows gravity to influence the weld pool, requiring careful control of travel speed and torch angle to maintain a uniform, defect-free bead.
Key Takeaways
- How to do 2G welding position: A horizontal groove weld performed on a vertical pipe or plate.
- It builds puddle control, bead consistency, and overall welding technique.
- Challenges include undercut, porosity, and weld sagging, which can be solved with practice.
- Works with SMAW, GMAW, or GTAW processes.
- Mastering this position improves safety, skill, and career opportunities.