Welding a pressure vessel safely and effectively requires strict adherence to ASME codes, proper PPE, certified materials, a clean workspace, and controlled welding techniques like SMAW, GTAW, or GMAW. Thorough inspection, testing, and post-weld finishing ensure the vessel can withstand high pressures and remain reliable over time.
Mastering How to Weld a Pressure Vessel Safely and Effectively
When you need a reliable pressure vessel, you may ask, “what is the welding procedure for pressure vessel success?” A clear procedure ensures every seam meets ASNME code requirements, prevents leaks, and keeps people safe. With planning, quality checks, and certifications, welding creates dependable structures that withstand high pressures.
Understand key safety guidelines (Step 1)
Prioritize safety before welding. Pressure vessels face extreme internal pressure, so weak welds risk failure. Follow ASME pressure vessel code and always use proper personal protective equipment (PPE).
Wear the proper gear
- Welding helmet with a proper shade lens.
- Flame-resistant clothing, gloves, and steel-toed boots.
- Respirator, if the metal or weld fumes are potentially hazardous.
Assess ventilation and fire hazards
Keep your workspace ventilated and free of flammable materials. A weld area that collects fumes or dust can be unsafe for both you and your coworkers.
Good news, this is easier than it sounds if you set up fans or fume extractors properly.
Follow ASME code compliance
The American Society of Mechanical Engineers (ASME) provides pressure vessel welding standards. For details, see how to comply with asme pressure vessel welding code. Compliance ensures safety, reliability, and durability.
Keep an up-to-date plan
Have a written welding procedure, including pre-weld, weld, and post-weld instructions. This document outlines the steps you will take for a given metal thickness, filler rod, or welding position.
By tackling safety upfront, you protect yourself, your team, and the integrity of the vessel.
Choose suitable materials (Step 2)
Once your safety measures are in place, you will need to select the right metal and filler materials. Using incompatible or subpar metals can lead to cracks, leaks, or full-on weld failures.
Pick the correct base material:
Carbon steel, stainless steel, and rare alloys are common in pressure vessel construction. Red River Team stresses selecting materials suited to withstand the intended temperature and pressure conditions.
Match your filler:
Choose filler rods or wires matching base metal properties, since mismatched filler weakens welds. For more on compatible processes, visit which welding is best for pressure vessel.
Check material certification and traceability:
ASME guidelines require certified materials with strict compositions. Documentation like test reports ensures traceability, while Red River highlights record-keeping for compliance and quality.
Consider prefabrication:
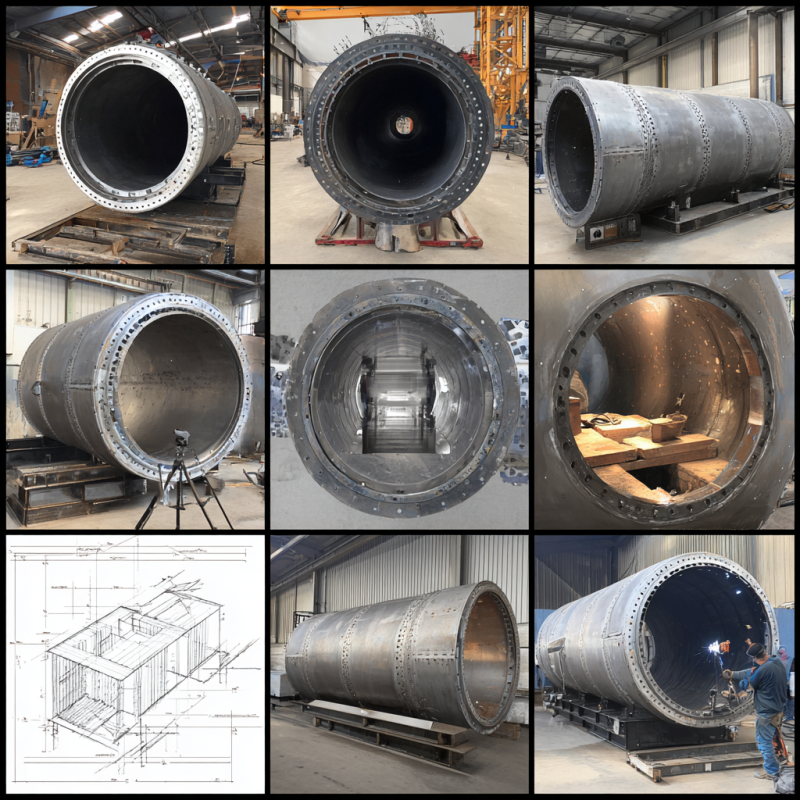
Prefabrication reduces on-site errors for large or specialized pressure vessels. (Red River Team) notes it cuts labor costs, exposure hours, and streamlines construction.
Ensuring you have the correct materials for your pressure vessel sets the foundation for a successful weld. Overlooking even small details here can create big issues later.
Prepare your welding workspace (Step 3)
After confirming your materials, it is time to get the workspace ready. Proper setup boosts your efficiency and helps you maintain consistent, high-quality welds.
Clean the metal surfaces
Remove oil, rust, or debris before welding. Clean edges with wire brush, grinder, and solvent wipe to prevent porosity or poor penetration.
Align and clamp the pieces
For safe welds, align plates or joints per procedure. Uneven edges cause defects. Use clamps or tack welds before final passes.
Choose the right tools
- Welding machine: Capable of the amperage and voltage required for your vessel’s thickness.
- Appropriate electrodes or wire: Pick the recommended diameter per your procedure.
- Measuring instruments: A tape measure or calipers help verify part alignment.
Mark reference points
Mark weld joint areas with chalk or paint. Red River stresses clear labeling and measurement to reduce guesswork and ensure uniform passes.
Maintain good posture and positioning
Large pressure vessel welding creates awkward positions. Arrange workspace for better torch angles, reposition vessels, or use rotating fixtures for consistency.
A well-prepared station is crucial. You will save time and ensure the vessel segments line up for optimal weld strength.
Apply correct welding technique (Step 4)
With materials and workspace ready, strike an arc. Pressure vessel welding often uses Shielded Metal Arc Welding (SMAW), Gas Tungsten Arc Welding (GTAW), or Gas Metal Arc Welding (GMAW).
Select the appropriate process:
SMAW suits thick vessel walls, GTAW fits high-alloy steels. Unsure which process works best? what is pressure vessel welding explains essential approaches.
Maintain consistent travel speed:
Maintain steady electrode or torch movement to prevent excess metal, gaps, or undercutting. Consistent speed ensures uniform penetration and reliable weld quality.
Ensure proper arc length:
Arc length varies by process. Too long causes spatter and poor penetration; too short risks electrode sticking, particularly during SMAW welding.
Watch your weld bead formation:
Closely observe the weld pool. A smooth bead with slight ripples shows good fusion, while blowholes, craters, or irregularities indicate problems.
Use a multi-pass approach if needed:
Thicker vessel walls need multiple passes. Each must fuse properly. Red River stresses layering ensures strong welds capable of withstanding internal stress.
Manage interpass temperature:
Pressure vessel codes set interpass temperature limits. Follow procedures carefully, overheating changes properties, while excessive cooling risks brittle microstructures and compromised weld integrity.
With practice, you’ll refine your welding technique. Red River applies Lean Six Sigma for continuous improvement, track anomalies, adjust steps, and once rhythm is found, pressure vessel welding becomes predictable and reproducible.
Inspect and finalize weld (Step 5)
Your welding passes might look complete, but the job is not done until you inspect and test your work. Any flaws you catch now are easier to fix in a shop environment than after the vessel is in service.
Conduct visual inspection:
Scan for spatter, cracks, or incomplete fusion. The surface should show even beads with uniform widths. If you spot raised or undercut edges, correct them promptly.
Use non-destructive testing (NDT)
Common methods like ultrasonic testing, radiographic inspection, or magnetic particle testing can reveal internal defects. According to Red River Team, thorough NDT is one of the best ways to confirm structural integrity without damaging the weld.
Check for codes and certifications
An ASME Authorized Inspector typically reviews the vessel’s paperwork and welding quality, ensuring it meets code. If you are aiming for a recognized credential, see pressure vessel welding certification to learn more about the certification path.
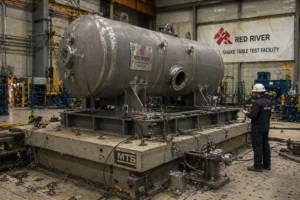
Perform hydrostatic or pneumatic tests
These tests subject the vessel to elevated pressure, confirming it can handle the design load. Hydrostatic testing uses water to apply pressure; pneumatic testing uses air or gas. Always follow the precise test guidelines in your welding procedure.
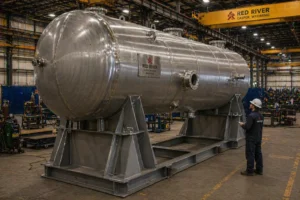
Apply final finishing touches
Some applications require post-weld heat treatment (PWHT) to relieve stresses built up in the metal. Additionally, you may add protective coatings or paint for corrosion resistance.
If your weld passes these checks, you have successfully completed a crucial manufacturing step for a safe and reliable pressure vessel.
How to weld a pressure vessel
Learning how to weld a pressure vessel requires diligence, precision, and a willingness to refine your skills. By prioritizing safety, choosing certified materials, maintaining a clean workspace, applying solid technique, and conducting thorough inspections, you set yourself up for success.
Following these steps will help you produce a vessel that not only meets code requirements but also stands up over time. Each weld you make carries a significant responsibility, but you have the knowledge and tools to tackle it confidently. You are now better equipped to follow in the footsteps of professional welders and fabrication teams who provide high-quality results in industries like energy, water treatment, and beyond.
Need a reliable partner?
Red River specializes in design and manufacturing of pressure vessels, prefabricated spools, and modular skids. Reach out today to experience the Red River difference.
Frequently Asked Questions
1. What is the welding procedure for a pressure vessel?
The welding procedure for a pressure vessel involves following specific codes and standards, preparing the material, selecting the right filler metal, performing proper preheating, executing controlled weld passes, and conducting post-weld inspections.
2. Which welding is best for a pressure vessel?
The best welding for a pressure vessel is typically arc welding methods like SMAW, GTAW, or GMAW, depending on the material, thickness, and pressure requirements.
3. How important is pre-weld cleaning?
Extremely important. Contaminants cause porosity and fusion problems. A clean work area and metal surface lead to a stronger weld.
4. Do I really need non-destructive testing?
Yes. Techniques like ultrasonic or radiographic tests help spot internal flaws that you cannot see with the naked eye. These tests confirm whether your weld meets industry code.
5. What safety gear is essential for pressure vessel welding?
You will need a welding helmet with the correct shade lens, flame-resistant clothing, gloves, safety glasses, and steel-toed boots. Proper ventilation equipment is equally critical.
Key takeaways
- Always prioritize safety by wearing proper PPE and categorizing potential risks.
- Use certified, tested materials that meet ASME requirements for quality control and traceability.
- Set up a clean, well-organized welding space with consistent alignment and clamping.
- Apply a suitable welding process, optimizing your travel speed, arc length, and interpass temperature.
Related Blog Post
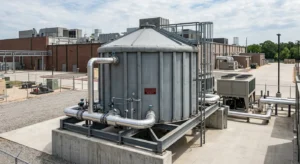
Thermal Storage Tanks for Data Centers
How Do Seismic Zones Impact Vessel Supports
What Anchorage Details Pass Review?
About Author

