How to Weld in 6G Position: Mastering the Art
Why Learning How to Weld in 6G Position Matters
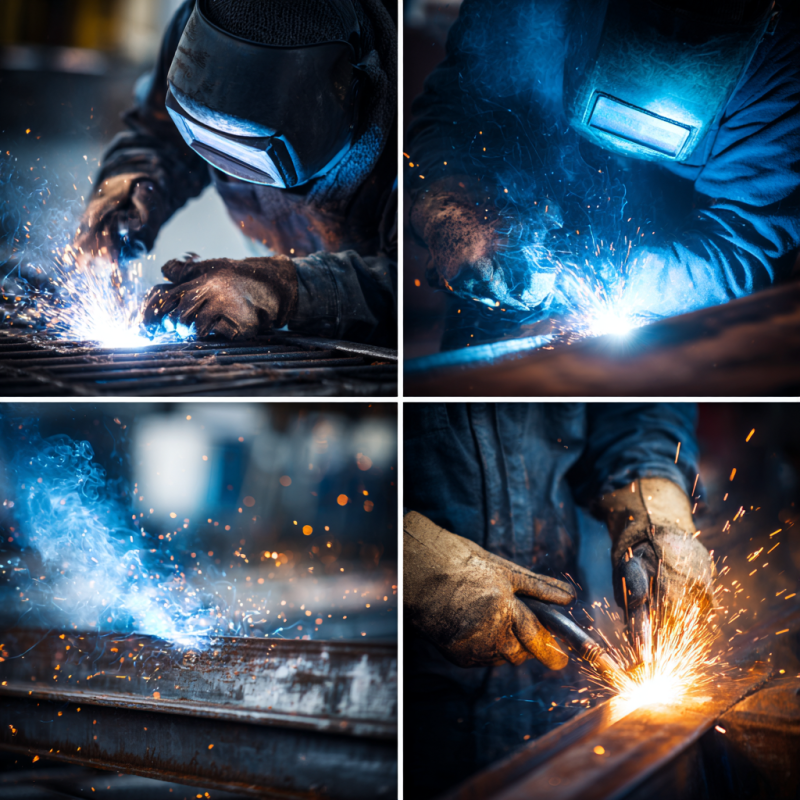
If you are searching for how to weld in 6G position, you’re in the right place. The 6G position is a challenging yet vital welding skill, especially for pipefitting requiring consistent performance and safety. The pipe sits at a 45-degree angle, demanding full circumferential coverage, vertical welding, and careful weld bead control. With the right tools, joint prep, PPE, and technique, even beginners can progress. Professionals value 6G skills for certifications and advanced projects. Focus on alignment, travel speed, and controlled heat distribution to improve vertical welding and master this complex pipe orientation.
Understand the 6G position
Before setting up your work area, know what separates the 6G position from other orientations like 1G, 2G, 3G welding position, or 5G welding position. In 6G, your pipe is fixed at 45°, and you cannot rotate it during welding. Each quarter turn presents a new challenge and direction for your weld bead.
- Full circumferential weld: Weld entirely around the pipe’s circumference.
- Multiple weld angles: You’ll weld overhead, sideways, and underneath.
- Thorough penetration: Each section requires attention for proper penetration and a smooth finish.
Many welders consider 6G a test of technique and patience. Programs like Red River LLC training emphasize a positive welding attitude. Even with basic skills, leaning on expert feedback and steady practice makes learning 6G more effective. For a refresher, check how many types of welding positions are there.
Gather essential equipment
Having the right tools prevents frustration during welding. Think of this as a stepping stone toward 6G success.
- Welding machine: Choose stable power output suitable for thick-walled pipes (capabilities).
- Shielding gas or flux: Match to your welding process (pressure vessels).
- Electrodes or filler rods: Match diameter and composition to project specs (pressure vessel fabrications).
- Quality PPE (Personal Protective Equipment): Helmet, gloves, fire-resistant clothing, steel-toed boots (about us).
- Clamps and fixtures: Maintain consistent angles at 45° tilt (prefabrication).
Proper setup allows consistency and safety. 6G is not easy, so preparation is essential (modular skids).
Master the joint setup
Next, you want to ensure the pipe joint itself is well-prepared. Good prep boosts your chance of achieving a uniform weld, so it is worth taking your time at this stage.
- Clean the surface: Remove oil, rust, debris (metal fabrications).
- Bevel the edges: Machine or grind edges for penetration (asme certified pressure vessels).
- Root gap and alignment: Use spacers/fixtures for consistent gap (pressure vessel sizing).
- Tack welds: Place small welds to hold position (american tank fabrication).
Proper alignment reduces weaving or undercut issues. Quality craftsmanship early prevents headaches during the weld (strongest pressure vessels).
Refine your welding technique
6G welding requires adaptive technique:
- Travel speed: Avoid weak or overfilled welds.
- Electrode angle: Keep 5–15° relative to joint; stabilize overhead..
- Arc length: Consistency prevents spatter and weak penetration.
- Weaving pattern: Gentle side-to-side distributes heat evenly.
Start with simpler positions, including horizontal welding like 1G, to build muscle memory. Gradually transition to 6G’s challenging angle while keeping your face shield down for safety (blog).
Overcome common challenges
Challenges include:
- Undercut edges: Adjust travel speed/amperage (pressure vessel manufacturing).
- Lack of penetration: Slow travel or adjust amperage/filler feed (certification of pressure vessels).
- Slag entrapment: Avoid wide weaves; clear after every pass (pressure vessels 3).
- Strained positions: Take breaks and maintain stable stance (prefabrication).
Red River LLC recommends dividing pipes into small sections to maintain heat distribution, posture, and control, including horizontal welding.
Practice with safety in mind
Because 6G welding involves multiple awkward angles, your posture is crucial to preventing strain or injury. You will often be reaching around the pipe, bending your elbows, and possibly leaning over in ways you might not expect.
- Protective gear: Helmet, gloves, fire-resistant clothing (employment at Red River LLC).
- Clear workspace: Avoid trip hazards (contact).
- Proper ventilation: Prevent fume inhalation (capabilities).
- Fire watch: Keep extinguishers or water nearby (request a quote).
At Red River’s facilities, for example, managing on-site exposure hours is a big safety priority. Prefabrication often means complex welding, including 6G, is done in a more controlled environment. Regardless of your location, try to replicate that controlled environment where you can clean area, stable footing, good lighting so you can focus on the weld instead of worrying about a misstep.
Explore prefabrication benefits
Prefabrication streamlines 6G welding:
- Controlled environment: Better temperature, humidity, and ventilation (prefabrication).
- Consistent alignment: Specialized fixtures reduce manual adjustment (modular skids blog).
- Reduced hazard: Fewer on-site hours (solutions).
- Enhanced quality control: Easier inspections, including radiography (pressure vessels).
At Red River LLC, prefabrication offers one big advantage: thorough oversight of each weld by trained specialists. Everyone from the welding experts to the Quality Control staff ensures the pipe sections meet required codes (such as ASME standards). Even if you are working independently without that level of support, adopting some prefabrication best practices can improve your 6G weld outcomes and help you build consistent habits over time.
Mastering Your Skills: How to Weld in 6G Position Successfully
You have covered a lot of ground here, from understanding the unusual tilt of 6G to organizing your equipment for success. This position can feel daunting, but you do not have to perfect it overnight. A bit of practice every week can make all the difference, and you will gradually refine your posture, speed, and technique.
Here is a quick recap so you can keep these core ideas in mind:
- Recognize the unique 6G challenges: Fixed 45° angle requires varied approaches (capabilities).
- Get the right gear: Stable power, PPE, electrodes (tools).
- Prepare the joint fully: Clean, bevel, align (pressure vessels).
- Adjust your weld technique: Travel speed, electrode angle, weave (prefabrication).
- Watch common pitfalls: Undercuts, slag, incomplete fusion (modular skids).
- Stay safe: Posture, workspace, ventilation (contact).
- Consider prefabrication: Replicate workshop conditions (prefabrication).
By practicing regularly, focusing on details like heat distribution and arc stability, and always elevating your personal safety, you will get more comfortable in 6G faster than you might expect. No matter where you weld—on-site or in a shop environment—these fundamentals will guide you toward better results. If you want to see how 6G compares to other orientations, you can explore 6G welding position or get an overview at what are the different welding position.
You have the know-how, and with each forge of your arc, you will gain the confidence. Go ahead, prepare your station, flip down your helmet, and give 6G a try. You might find it is not just a test of skill, but also an opportunity to show your adaptability and passion for precision welding. You have got this, and the time you invest now will pay off in every future project that calls for a 6G-level challenge.
Ready to elevate your welding skills?
Start practicing the 6G welding position today with the right tools, joint prep, and safety measures. Whether you’re aiming for certification or mastering advanced pipework, consistent practice and attention to technique will take your welding to the next level. Set up your workspace, secure your PPE, and take the first step toward becoming a confident, versatile welder.
Frequently Asked Questions
1. What is the 6G welding position?
It is a test position where a pipe is fixed at a 45° angle, requiring welds at multiple orientations.
2. Why is the 6g welding position important?
The 6G welding position is important because it develops advanced skills, ensures high-quality welds in critical applications, and prepares welders for complex industrial projects.
3. What equipment is needed for 6G welding?
Essential tools include a stable welding machine, appropriate electrodes or filler rods, shielding gas or flux, clamps and fixtures, and full PPE like a helmet, gloves, and flame-resistant clothing.
4. How can I improve my 6G welding technique?
Focus on proper joint preparation, control travel speed, maintain correct electrode angles, practice weaving patterns, and work on flat or horizontal positions first to build muscle memory.
5. What safety measures should I follow when welding in 6G?
Use protective gear, ensure proper ventilation, maintain a clear workspace, adopt a stable posture, and consider fire safety measures to prevent accidents and fatigue.
Key Takeaways
- The 6G welding position is a fixed 45-degree pipe weld requiring full circumferential coverage and multiple orientations.
- Proper equipment and PPE are critical for consistent, safe welding.
- Joint preparation, including cleaning, beveling, and alignment, is essential for uniform welds.
- Technique matters, control travel speed, electrode angle, arc length, and weaving pattern to prevent common defects.