The 1G welding position is a flat or horizontal setup that’s ideal for beginners, providing stability, clear visibility, and easier control over the weld puddle. Mastering 1G builds foundational skills like bead consistency, arc control, and heat management, preparing welders for more advanced positions and projects.
Master the Basics of How to Weld in 1G Position
You might have heard that mastering how to weld in 1G position is one of the best ways to start your welding journey. Many experienced welders agree that 1G, a flat welding position that offers a comfortable angle to see and control your work. This approach often feels less intimidating than vertical or overhead welding.
Below is a friendly breakdown of the 1G welding position, including essential steps, key safety tips, and a comparison with other common positions. By the end, you’ll understand how to weld in 1G position and gain the confidence to apply these fundamentals in your own projects, preparing you to progress to more advanced welding techniques.
Understanding the 1G position
When you weld in 1G, position the workpiece so the weld area faces up, hence the name “flat position.” For pipes, roll the pipe so you’re always welding at the top. This setup helps you maintain control over the molten metal and produce a steady bead.
- 1G vs. other G-positions: “G” stands for “groove,” indicating the type of weld preparation required, with the number indicating the orientation.
- Why it matters: 1G is recognized as a user-friendly position. It helps you focus on key welding elements like bead shape, speed, and heat management without wrestling with gravity.
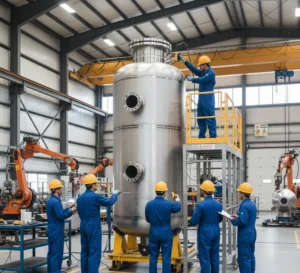
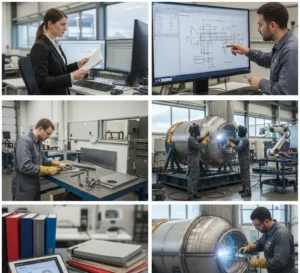
- Real-world use: In large manufacturing environments, such as at Red River, welders often rely on flat positions (when possible) to produce consistent welds on pressure vessels, spools, and piping packages.
If you’re curious about how 1G fits into the bigger picture, you can explore the different welding positions. This guide explains how each position affects technique and highlights challenges posed by various orientations.
Gather your essentials
Before learning how to weld in 1G position, ensure you have the right tools and safety gear. Proper preparation lets you focus on perfecting your weld rather than fixing mistakes:
- Personal protective equipment (PPE): Wear a welding helmet with the correct shade, fire-resistant clothing, gloves, and proper footwear to protect against sparks and debris.
- Welding machine and consumables: Make sure your MIG, TIG, or Stick setup matches the material thickness, and have clean filler rods or wires on hand.
- Proper ventilation: Work in an area with good airflow to reduce fumes. Industrial setups may have advanced ventilation, while home setups can use windows or exhaust fans.
- Easy-to-access work surface: Keep your table at a comfortable height and well-lit so you can clearly see the weld puddle.
- Clean metal surfaces: Remove oil, rust, and paint to prevent porosity and weak joints. Always grind or brush the surface before welding.
You’ll see these precautions at companies like Red River, where strict safety measures are part of daily operations. Limiting on-site exposure and planning work in controlled environments reduces hazards and improves consistency. Following a safety-first approach at home or in a small workshop helps you develop skills that meet industry standards
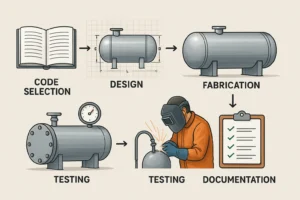
Steps to weld in 1G
Below is a step-by-step guide on how to weld in 1G position. Adjust specifics depending on whether you use Stick (SMAW), MIG (GMAW), or TIG (GTAW); the core principles remain the same.
- Prepare your workspace: Ensure your area is well-lit and clutter-free. Position the metal so the joint is easily accessible from above while you stand or sit comfortably.
- Tack your pieces: Align your base metals and place small tack welds about an inch long at each end. Tacks keep everything in place so you can avoid movement or gaps.
- Check your parameters: Set voltage, amperage, and wire feed (if applicable) according to metal thickness. Follow equipment manuals or reference charts to avoid undercut or spatter.
- Position yourself: Stand or crouch for a clear top-down view of the joint. Good posture helps maintain consistent angle and travel speed.
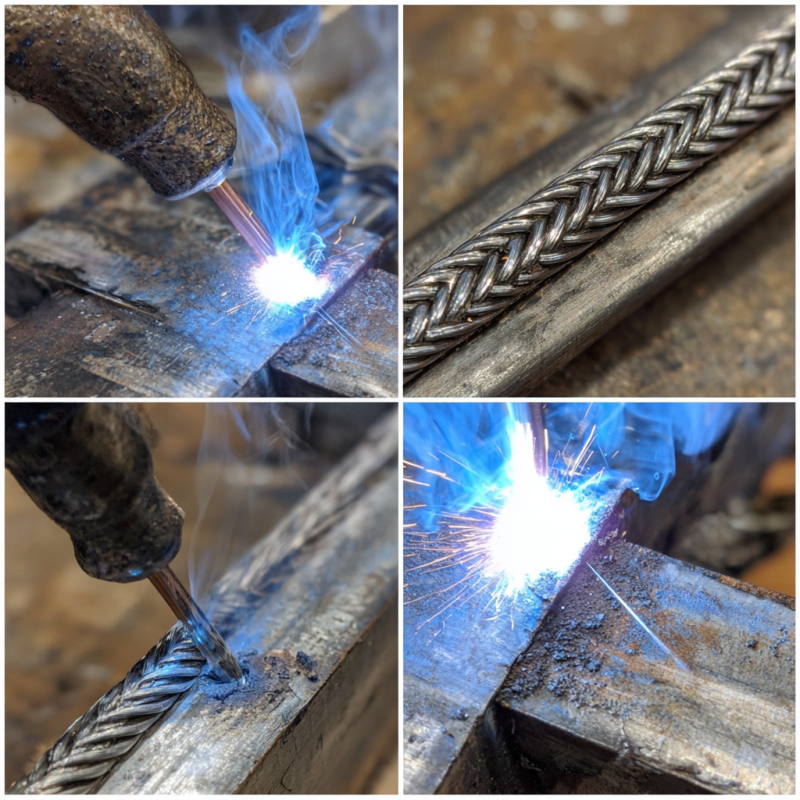
- Strike the arc: If you are using Stick welding, hold the electrode at the recommended angle (commonly 15–20 degrees from vertical). With MIG, keep the gun angled slightly toward the direction of travel. For TIG, feed the filler rod at a controlled pace into the molten puddle.
- Focus on the puddle: Ensure the molten metal remains uniform. Too much heat causes runny puddles; too little creates high, ropey beads lacking fusion.
- Move steadily: Keep a consistent travel speed. Slow movement widens the bead; fast movement narrows it. Steady motion produces a uniform weld.
- Inspect your weld: Let the weld cool naturally. Remove slag if using Stick welding, then visually inspect. A proper 1G weld is flat or slightly convex with no undercuts along the toes.
This sequence is easier to master than overhead or vertical positions. Practicing on scrap metal and running multiple beads on a single plate helps refine your technique and reduce material waste.
Tips to overcome common challenges
Even though 1G is considered a beginner-friendly welding position, you may hit a few hurdles. Below are typical pitfalls and suggestions to address them:
- Porosity: Gas pockets form if the metal isn’t clean or shielding gas is insufficient. Remove paint, rust, and debris, and check your gas flow.
- Undercut: Occurs when weld edges erode the base metal. Adjust travel speed and angle to fill edges properly.
- Excess spatter: Too high amperage or incorrect wire feed can cause spatter. Fine-tune machine settings, and for MIG welding, maintain the correct contact-tip-to-work distance.
- Inconsistent bead profile: Wavy or uneven beads usually result from hand movement. Maintain a steady hand, consistent electrode angle, and uniform travel speed.
Red River’s welding experts emphasize consistent technique to prevent common issues. Internal training programs teach maintaining a clean workspace and using proper parameters to reduce rework. To become proficient, regularly analyze your welds and adjust your approach. Welding relies as much on careful observation and gradual improvement as on raw skill.
Comparing 1G to other positions
There are multiple welding positions beyond 1G, each having its own challenges. Here is a quick overview:
| Position | Orientation | Difficulty Level | Typical Use Case |
| 1G | Flat or pipe rolled | Easiest | Basic projects, easy for new welders |
| 2G | Horizontal groove | Moderate | Cylinders, pipes that cannot be rotated |
| 3G | Vertical groove | Moderate-high | Structural jobs where upright welding is required |
| 4G | Overhead groove | High | Overhead joints, often used in complex structures |
| 5G | Fixed pipe, horizontal axis | High | Pipes that cannot be turned, multiple pass welds |
| 6G | Inclined pipe | Highest | Certification tests, advanced piping installations |
You can explore other positions, such as the differences between 2G and 3G, in how many types of welding positions are there. It’s also helpful to see why some positions are more challenging by checking which welding position is the easiest. The good news: skills gained in 1G often transfer well when tackling more advanced positions.
How to Weld in 1G Position: Building the Skills for Stronger, More Advanced Welding
Learning how to weld in 1G position is the first step to mastering welding fundamentals. The flat or rotated setup provides stability, visibility, and comfort, helping beginners focus on bead consistency, arc control, and safe practices. Using clean materials, proper machine settings, and structured steps like tacking, welding, and inspecting which prevents common issues like porosity or undercuts. Each pass builds muscle memory and confidence, preparing you to advance to vertical, overhead, and fixed-pipe positions for greater versatility and career growth.
Ready to Master How to Weld in 1G Position?
Start practicing today and sharpen your welding skills in the 1G position. Whether at home or in industrial applications, every bead you lay builds the confidence to take on more advanced projects. Contact Us Today or Request a Quote and bring your project to life.
Frequently Asked Questions
1. What is the 1G welding position?
It is the flat or horizontal position where plates or pipes are laid flat for welding, making it the easiest for beginners.
2. How to weld in 1G welding position?
Set up the workpiece flat, adjust heat and wire feed for the metal thickness, maintain a steady travel speed, hold a 10–15° torch angle, and watch the weld puddle for smooth, even beads.
3. What does 1G mean in welding?
In welding, 1G means a flat groove weld position where the plate or pipe is set horizontally, letting the welder create a horizontal bead with gravity helping keep the molten pool stable.
4. Why should beginners learn how to weld in 1G position first?
Beginners should start with how to weld in 1G position because it provides the most stability and visibility over the weld puddle. This helps new welders focus on speed, heat control, and bead consistency without dealing with gravity challenges.
5. What equipment do I need to weld in 1G position?
To learn how to weld in 1G position, you need a welding machine (MIG, TIG, or Stick), personal protective equipment (helmet, gloves, fire-resistant clothing, and boots), filler materials, and a clean, well-ventilated workspace.
Key Takeaways
- 1G is the most beginner-friendly welding position.
- Preparation and safety gear are essential for quality results.
- Consistency in technique prevents common welding flaws.
- Mastering 1G builds a foundation for advanced welding positions.
Related Blog Post
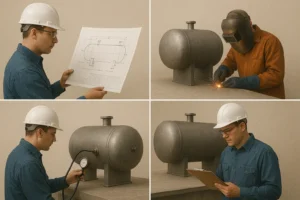
Pressure Vessel Design & Engineering: Concept to Launch
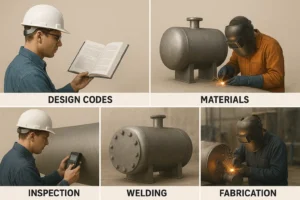
What is Pressure Vessel Design and Engineering: Code-Ready Guide
What are the Key Factors in Pressure Vessel Engineering
How Do You Design a Pressure Vessel: A Step-By-Step Guide