
Welding positions range from beginner-friendly 1G (flat) to expert-level 6G (angled pipe), each developing control, precision, and safety under different angles. Mastering all positions through consistent practice and training improves weld quality, versatility, and employability across industrial and workshop settings.
Start Your Welding Journey with Welding Positions
Experienced welding professionals, including those at Red River (an American Welding Society member), often stress that knowledge of welding positions is the foundation for quality, precision, and workplace safety. Proper positioning not only improves the strength and appearance of a weld but also reduces the risk of errors that could lead to downtime, defective components, or scrapped materials. By familiarizing yourself with all the major welding positions, you gain practical skills that can be applied across multiple projects and materials. By the end of this guide, you will have actionable tips for each primary position and a clearer understanding of which welding positions are best suited for your next project, helping you work more efficiently and confidently every time.
Explore essential welding positions
In general, there are six primary welding positions, commonly labeled 1G, 2G, 3G, 4G, 5G, and 6G. The “G” stands for “groove,” indicating work in a bevel or groove joint. Each welding position requires specific techniques to control the weld puddle, maintain stability, and ensure safety. Understanding all welding positions helps welders adapt their approach for consistent, high-quality results. Below, you will learn each position’s key traits, practical tips, and how mastering these welding positions can improve efficiency, reduce errors, and strengthen your overall welding skills across different projects.
Learn 1G: The flat vantage
1G, sometimes called the flat position, is often considered the easiest of the welding positions to master. In this position, you weld a piece lying horizontally, allowing gravity to help keep the molten weld puddle stable. Among all welding positions, 1G is ideal for beginners because it builds confidence and helps develop control over speed and angle. Practicing 1G thoroughly prepares you for more complex welding positions like vertical or overhead. Understanding the fundamentals of 1G and other welding positions ensures stronger, cleaner welds and lays the foundation for advancing your welding skills effectively.
- Recommended for beginners: Because it is flat, you can better observe the weld pool.
- Common uses: Fabricating flat plates or large assemblies in a workshop.
- Key challenge: Over-welding (laying too much filler) if you move too slowly.
Professionals often introduce 1G first to help beginners learn puddle flow and arc control with minimal complexity. If you want a deeper look, check out what is 1g welding position for more details. Among the six main welding positions, 1G is considered the easiest because the workpiece lies horizontally, allowing gravity to stabilize the molten weld puddle. Practicing this position builds confidence and provides a solid foundation before moving on to more challenging welding positions like vertical or overhead. Mastering 1G and understanding all welding positions ensures stronger, cleaner welds across various projects.
Use 2G: The horizontal approach
2G involves welding horizontally, typically on a cylindrical or rectangular piece that remains in a fixed horizontal orientation. This welding position is more challenging than 1G because gravity can pull the weld bead downward, requiring greater control. Understanding 2G alongside other welding positions helps welders adapt techniques for puddle control, speed, and angle. Practicing this position builds skill and prepares you for even more complex welding positions, such as vertical and overhead. Mastery of 2G and the full range of welding positions ensures stronger, more consistent welds and a solid foundation for advancing your welding expertise.
- Best for: Pipe sections or structural beams that remain horizontal during welding.
- Unique challenge: Avoiding weld sag in the lower side of the joint.
- Tip: Adjust travel speed so the weld droplet stays well-distributed.
If you would like to learn more about the fundamentals, visit what does 2g welding position mean. This welding position is commonly used in industrial settings where large containers or vessels must remain fixed. Compared to 1G, it is more challenging because gravity can affect the weld bead, requiring careful control of speed and angle.
Tackle 3G: The vertical climb
3G refers to a vertical welding setup, where the torch or electrode moves upward or downward along a vertical joint. This welding position requires careful control of heat input because gravity affects the molten metal. Practicing 3G alongside other welding positions helps welders improve technique, stability, and bead consistency. Compared to flat and horizontal positions, it is more challenging but essential for advanced projects.
- Typical uses: Fabrication of standing columns or panels.
- Tactical tip: Use slightly lower heat settings so the weld pool does not drip.
- Key skills: Uphill and downhill weaving, plus consistent travel speed.
Welders at Red River often practice vertical welds for structural applications, such as custom pressure vessel shells. Even if you are not working on pressure vessels, mastering 3G helps reinforce your torch control. Dive deeper into 3G with what does 3g welding position mean.
Master 4G: The overhead angle
4G is considered an overhead welding position, where the metal is placed above, requiring you to weld from below. This welding position is challenging because gravity constantly pulls the molten weld, demanding careful control and steady technique. Practicing 4G alongside other welding positions helps welders develop strength, precision, and consistency in difficult angles.
- Common environments: Repair jobs under equipment, overhead pipes, or ceilings.
- Biggest challenges: Preventing spatter and drips from carving into your protective gear.
- Pro tip: Keep the electrode or torch close to the weld pool, and segment your weld bead into smaller, controlled passes.
Even if overhead welding feels daunting, you can build confidence by practicing short runs with proper face shields and gloves. For specifics on overhead, see how to do 4g welding position.
Improve 5G: The fixed challenge
5G generally applies to pipe welding, where the pipe is fixed horizontally, requiring you to move the torch around its circumference in flat, vertical, and overhead orientations. This welding position is more challenging than basic setups because you cannot rotate the material, demanding precise control and consistent technique. Practicing 5G alongside other welding positions helps welders build versatility and confidence in different angles. Mastering this position and understanding all key welding positions ensures strong, reliable welds in industrial and construction projects. Skilled handling of multiple welding positions prepares welders for complex tasks with efficiency and accuracy.
- Real-world usage: Pipelines in energy or water infrastructure.
- Common pitfalls: Inconsistent bead overlap as you rotate your arm around the pipe.
- Tip: Break down the pipe into quadrants and approach each section systematically.
5G requires a careful approach since your arm, wrist, and body positioning shift continuously. Red River’s welding team trains in 5G to handle long spool sections in prefabricated modules. If you need more insight, check what is 5g welding position.
Conquer 6G: The final challenge
6G is widely considered the most advanced of the welding positions, with the pipe set at a 45-degree angle that cannot be moved. This welding position requires precise control over every angle, often in tight or awkward spaces, making it a true test of skill. Practicing 6G alongside other welding positions helps welders develop mastery over technique, puddle control, and consistency.
- Why it matters: A 6G certification is highly respected, particularly in specialized industries such as oil and gas.
- Challenges: Gravity pulls the weld pool in unpredictable ways as you rotate your wrist.
- Winning strategy: Practice, practice, practice. Many welders use a “roll-out” technique with subtle adjustments in torch angle and filler speed.
To learn more about why this angle is so essential, see why is 6g welding position important. Mastering 6G sets you apart, proving your ability to control complex weld angles under real-world constraints.
Refine your welding technique
Technical proficiency in each of the six main welding positions helps welders adapt to a wide range of job demands. Mastering these welding positions ensures consistent quality, stronger welds, and safer work practices across various projects. Practicing different welding positions allows you to handle flat, vertical, overhead, and pipe setups with confidence, reducing errors and improving efficiency. Below, you will find cross-position tips that experienced welders often rely on for success.
Practice consistent heat control
- Each position reacts differently to heat. If you see the weld pool running too fast, dial back the power or move more quickly.
- Maintaining steady arc length is crucial in preventing burn-through or incomplete fusion.
Choose proper shielding gas and filler
- Your choice of filler metal can influence bead shape, especially in overhead or vertical welds.
- Use the recommended shielding gas flow rate to maintain weld integrity, for example, 15 to 20 cubic feet per hour (CF/H) for MIG or TIG (this rate can vary based on location and environment).
Study metal thickness
- Thicker metal can demand higher amperage and more filler passes, especially in vertical or overhead positions.
- Thinner materials require gentler heat to avoid warping or burn-through.
Leverage a comfortable posture
- If you can, position yourself so your welding arm has a stable rest. Overreliance on your shoulder or forearm can tire you out and reduce weld quality.
- When tackling overhead or vertical welds, keep your stance balanced and ensure your safety gear covers you from sparks and spatter.
Know your equipment
- Modern welding machines often come with preset programs based on joint type or welding position. Using these can reduce guesswork.
- Practice using different torches or stick electrodes to see how each feels in your hand for a given position.
Create a hazard-free workspace
- Always check for moisture around your materials and avoid clutter.
- Good ventilation, fire-resistant blankets, and a clear line of sight (especially overhead) reduce accidents.
Understanding Welding Positions: A Clear Guide for Beginners and Pros
From 1G’s flat vantage to 6G’s most demanding angle, your path in mastering all welding positions can be surprisingly direct when you break it down into small, focused steps. Each position trains your coordination so you can manage the weld puddle under various angles and conditions. If you want to compare all positions at once, or see how many exist in official guidelines, take a glance at how many types of welding positions are there.
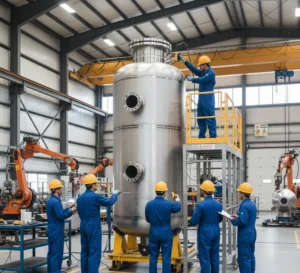
Welding experts such as the team at Red River emphasize thorough training in each position to ensure high-quality results. The controlled environment of a dedicated fabrication facility can speed up your learning, since you reduce exposure to chance variables (like harsh weather or cramped on-site conditions). Prefabrication modules, for instance, often demand a variety of angles, so having a full range of position skills makes your work more efficient.
Start Your Welding Journey Today
Ready to master welding positions? Begin with the basics, practice consistently, and progress toward advanced certifications like 6G. The more positions you master, the more valuable you become in the industry. Contact us today to start your welding journey.
Frequently Asked Questions
1. What are the different welding positions?
The different welding positions are flat, horizontal, vertical, and overhead.
2. How many types of welding positions are there?
There are six types of welding positions: 1G, 2G, 3G, 4G, 5G, and 6G.
3. Which welding position is the easiest?
The easiest welding position is the flat position (1G).
4. Do industries require all welding positions?
Yes, industries like oil, gas, and construction demand welders skilled in multiple positions for safety and quality.
5. How can a welder improve their skills in different positions?
Practice, formal training, and certifications help welders become proficient in multiple positions, enhancing employability and job performance.
Key Takeaways
- Welding positions range from beginner-friendly (1G) to expert-level (6G).
- Each teaches heat control, puddle stability, and precision.
- 6G certification is highly valued across industries.
- Prefabrication often requires multiple positions.
- Practice consistently to improve weld quality and confidence.
Related Blog Post
Pressure Vessel Design & Engineering: Concept to Launch
What is Pressure Vessel Design and Engineering: Code-Ready Guide
What are the Key Factors in Pressure Vessel Engineering
How Do You Design a Pressure Vessel: A Step-By-Step Guide
What is Pressure Vessel Fabrication and Manufacturing
- Your Guide to the 5G Welding Position
- Why the 4G Welding Position Is Essential for Your Skills
- 3G Welding Position Explained: What You Need to Know
- Why the 2G Welding Position Is Essential for Your Skills
- The Ultimate Guide to the 1G Welding Position for Beginners
- Achieve Perfection with the 6G Welding Position Techniques

